W3RDW Blog - First Post
This post is copied from a separate site where I plan to document content related to one of my hobbies, HAM radio. This post is the first post I shared on my other site, https://w3rdw.radio. In the future, I plan to only post HAM radio content on the W3RDW site. You can find a link in the top right corner of my WhiteMatterTech site.
Setting Up an ADS-B Flight Tracker with a Cheap Antenna and Docker on Ubuntu
In this tutorial, I’ll walk you through the process of setting up an ADS-B flight tracker using a cheap antenna and Docker on Ubuntu. ADS-B (Automatic Dependent Surveillance – Broadcast) is a surveillance technology that allows aircraft to determine their position via satellite navigation and periodically broadcast it. By setting up your own ADS-B receiver, you can track flights in your area and contribute to the global flight tracking network.
My particular setup includes an ESXi host with a Ubuntu 21.04 VM. The USB dongle I’ll recommend is passed through to the VM. While a solid understandint of Docker is not fully required, it will be benefical for troubleshooting possible USB issues and customizing your configs. If you need help installing Docker, I recommend this tutorial to install Docker and this tutorial to install Docker Compose.
Prerequisites
Before we begin, you’ll need a RTL SDR USB dongle and a recommended ADS-B antenna. If you do not have a solution already, you could choose from either the RTL SDR Kit or Standalone below. The SMA extension cable was useful for me to run my antenna from my ESXi server up to my attic. And finally, the recommended ADS-B antenna below is well poised for our purposes:
As an Amazon Associate, I earn from qualifying purchases. Thank you for supporting the maintenance of this blog. The pricing will be the same for you regardless if you use my links or not! Thanks for your support!
- RTL SDR (Kit)
- RTL SDR USB Dongle (Standalone)
- Optional SMA Extension Cable
- Recommended ADS-B Antenna
- Ubuntu machine (physical or virtual)
- Basic knowledge of Docker and terminal commands
Step 1: Hardware Setup
The hardware setup is straighforward.
- Connect your ADS-B antenna and any extensions cales you need to the RTL SDR USB dongle.
- Connect the RTL SDR USB dongle to your Ubuntu machine.
- Ensure that the USB dongle is recognized by your system.
Step 2: Configure Environment Variables
Create a .env file in your project directory, and be sure to configure the necessary environment variables:
touch .env
FEEDER_TZ=America/New_York
ADSB_SDR_SERIAL=0
ADSB_SDR_PPM=001
FEEDER_LAT=your_latitude
FEEDER_LONG=your_longitude
FEEDER_ALT_M=altitude_in_meters
FEEDER_ALT_FT=altitude_in_feet
FEEDER_NAME=whatever_you_want
FR24_SHARING_KEY=sharingkey_from_flightradar24.com
Step 3: Create Docker Compose Configuration
Now, we will create a docker-compose.yml file that defines the services required for your ADS-B flight tracker, including readsb for data collection, fr24 for Flightradar24 integration, tar1090 for web-based visualization, and watchtower for automated updates.
- readsb: This service collects data from your ADS-B receiver and provides it for further processing. It is responsible for gathering aircraft data and making it available for visualization and integration.
- fr24: This service integrates your ADS-B data with Flightradar24, a popular flight tracking service. By providing your Flightradar24 sharing key, you can contribute your data to their network and access additional features.
- tar1090: Tar1090 is a web-based tool that visualizes ADS-B data. It provides a user-friendly interface for tracking aircraft, viewing flight paths, and exploring other flight-related information.
- watchtower: Watchtower is an automated update tool for Docker containers. It ensures that your ADS-B flight tracker components are always up-to-date by automatically pulling the latest Docker images and restarting the services.
Create the docker-compose.yml file in your project directory:
touch docker-compose.yml
Add the following configuration:
version: '3.8'

volumes:
  readsbpb_rrd:
  readsbpb_autogain:

services:
  readsb:
    image: ghcr.io/sdr-enthusiasts/docker-readsb-protobuf:latest
    tty: true
    container_name: readsb
    hostname: readsb
    restart: always
    devices:
      - /dev/bus/usb:/dev/bus/usb
    ports:
      - 8080:8080
    environment:
      - TZ=${FEEDER_TZ}
      - READSB_DEVICE_TYPE=rtlsdr
      - READSB_RTLSDR_DEVICE=0
      - READSB_GAIN=autogain
      - READSB_LAT=${FEEDER_LAT}
      - READSB_LON=${FEEDER_LONG}
      - READSB_RX_LOCATION_ACCURACY=2
      - READSB_STATS_RANGE=true
      - READSB_NET_ENABLE=true
    volumes:
      - readsbpb_rrd:/run/collectd
      - readsbpb_autogain:/run/autogain
    tmpfs:
      - /run/readsb
      - /var/log

  fr24:
    image: ghcr.io/sdr-enthusiasts/docker-flightradar24:latest
    tty: true
    container_name: fr24
    restart: always
    depends_on:
      - readsb
    ports:
      - 8754:8754
    environment:
      - BEASTHOST=readsb
      - TZ=${FEEDER_TZ}
      - FR24KEY=${FR24_SHARING_KEY}
    tmpfs:
      - /var/log

  tar1090:
    image: mikenye/tar1090:latest
    tty: true
    container_name: tar1090
    restart: always
    depends_on:
      - readsb
    environment:
      - TZ=${FEEDER_TZ}
      - BEASTHOST=readsb
      - MLATHOST=mlathub
      - LAT=${FEEDER_LAT}
      - LONG=${FEEDER_LONG}
      - GRAPHS1090_DARKMODE=true
    tmpfs:
      - /run:exec,size=64M
      - /var/log:size=32M
    ports:
      - 8078:80

  watchtower:
    image: containrrr/watchtower:latest
    tty: true
    container_name: watchtower
    restart: always
    environment:
      - TZ=${FEEDER_TZ}
      - WATCHTOWER_CLEANUP=true
      - WATCHTOWER_POLL_INTERVAL=86400
      - WATCHTOWER_ROLLING_RESTART=true
    volumes:
      - /var/run/docker.sock:/var/run/docker.sock
You should now have a .env file and a docker-compose.yml in your directory, and you’re ready to start the services.
Step 4: Start the ADS-B Flight Tracker
To start the ADS-B flight tracker, navigate to the directory containing your docker-compose.yml file using Terminal. Run the following command:
docker-compose up -d
This command will download the necessary Docker images and start the services specified in your docker-compose.yml file. The ADS-B flight tracker will begin receiving and processing data from aircraft in your area.
Step 5: Access the Web Interface
Once the services are up and running, you can access the web interfaces:
- ADSB Data: Open your web browser and go to
http://localhost:8080to view ADS-B data usingreadsb. - Flightradar24 Integration: Access Flightradar24 integration at
http://localhost:8754.
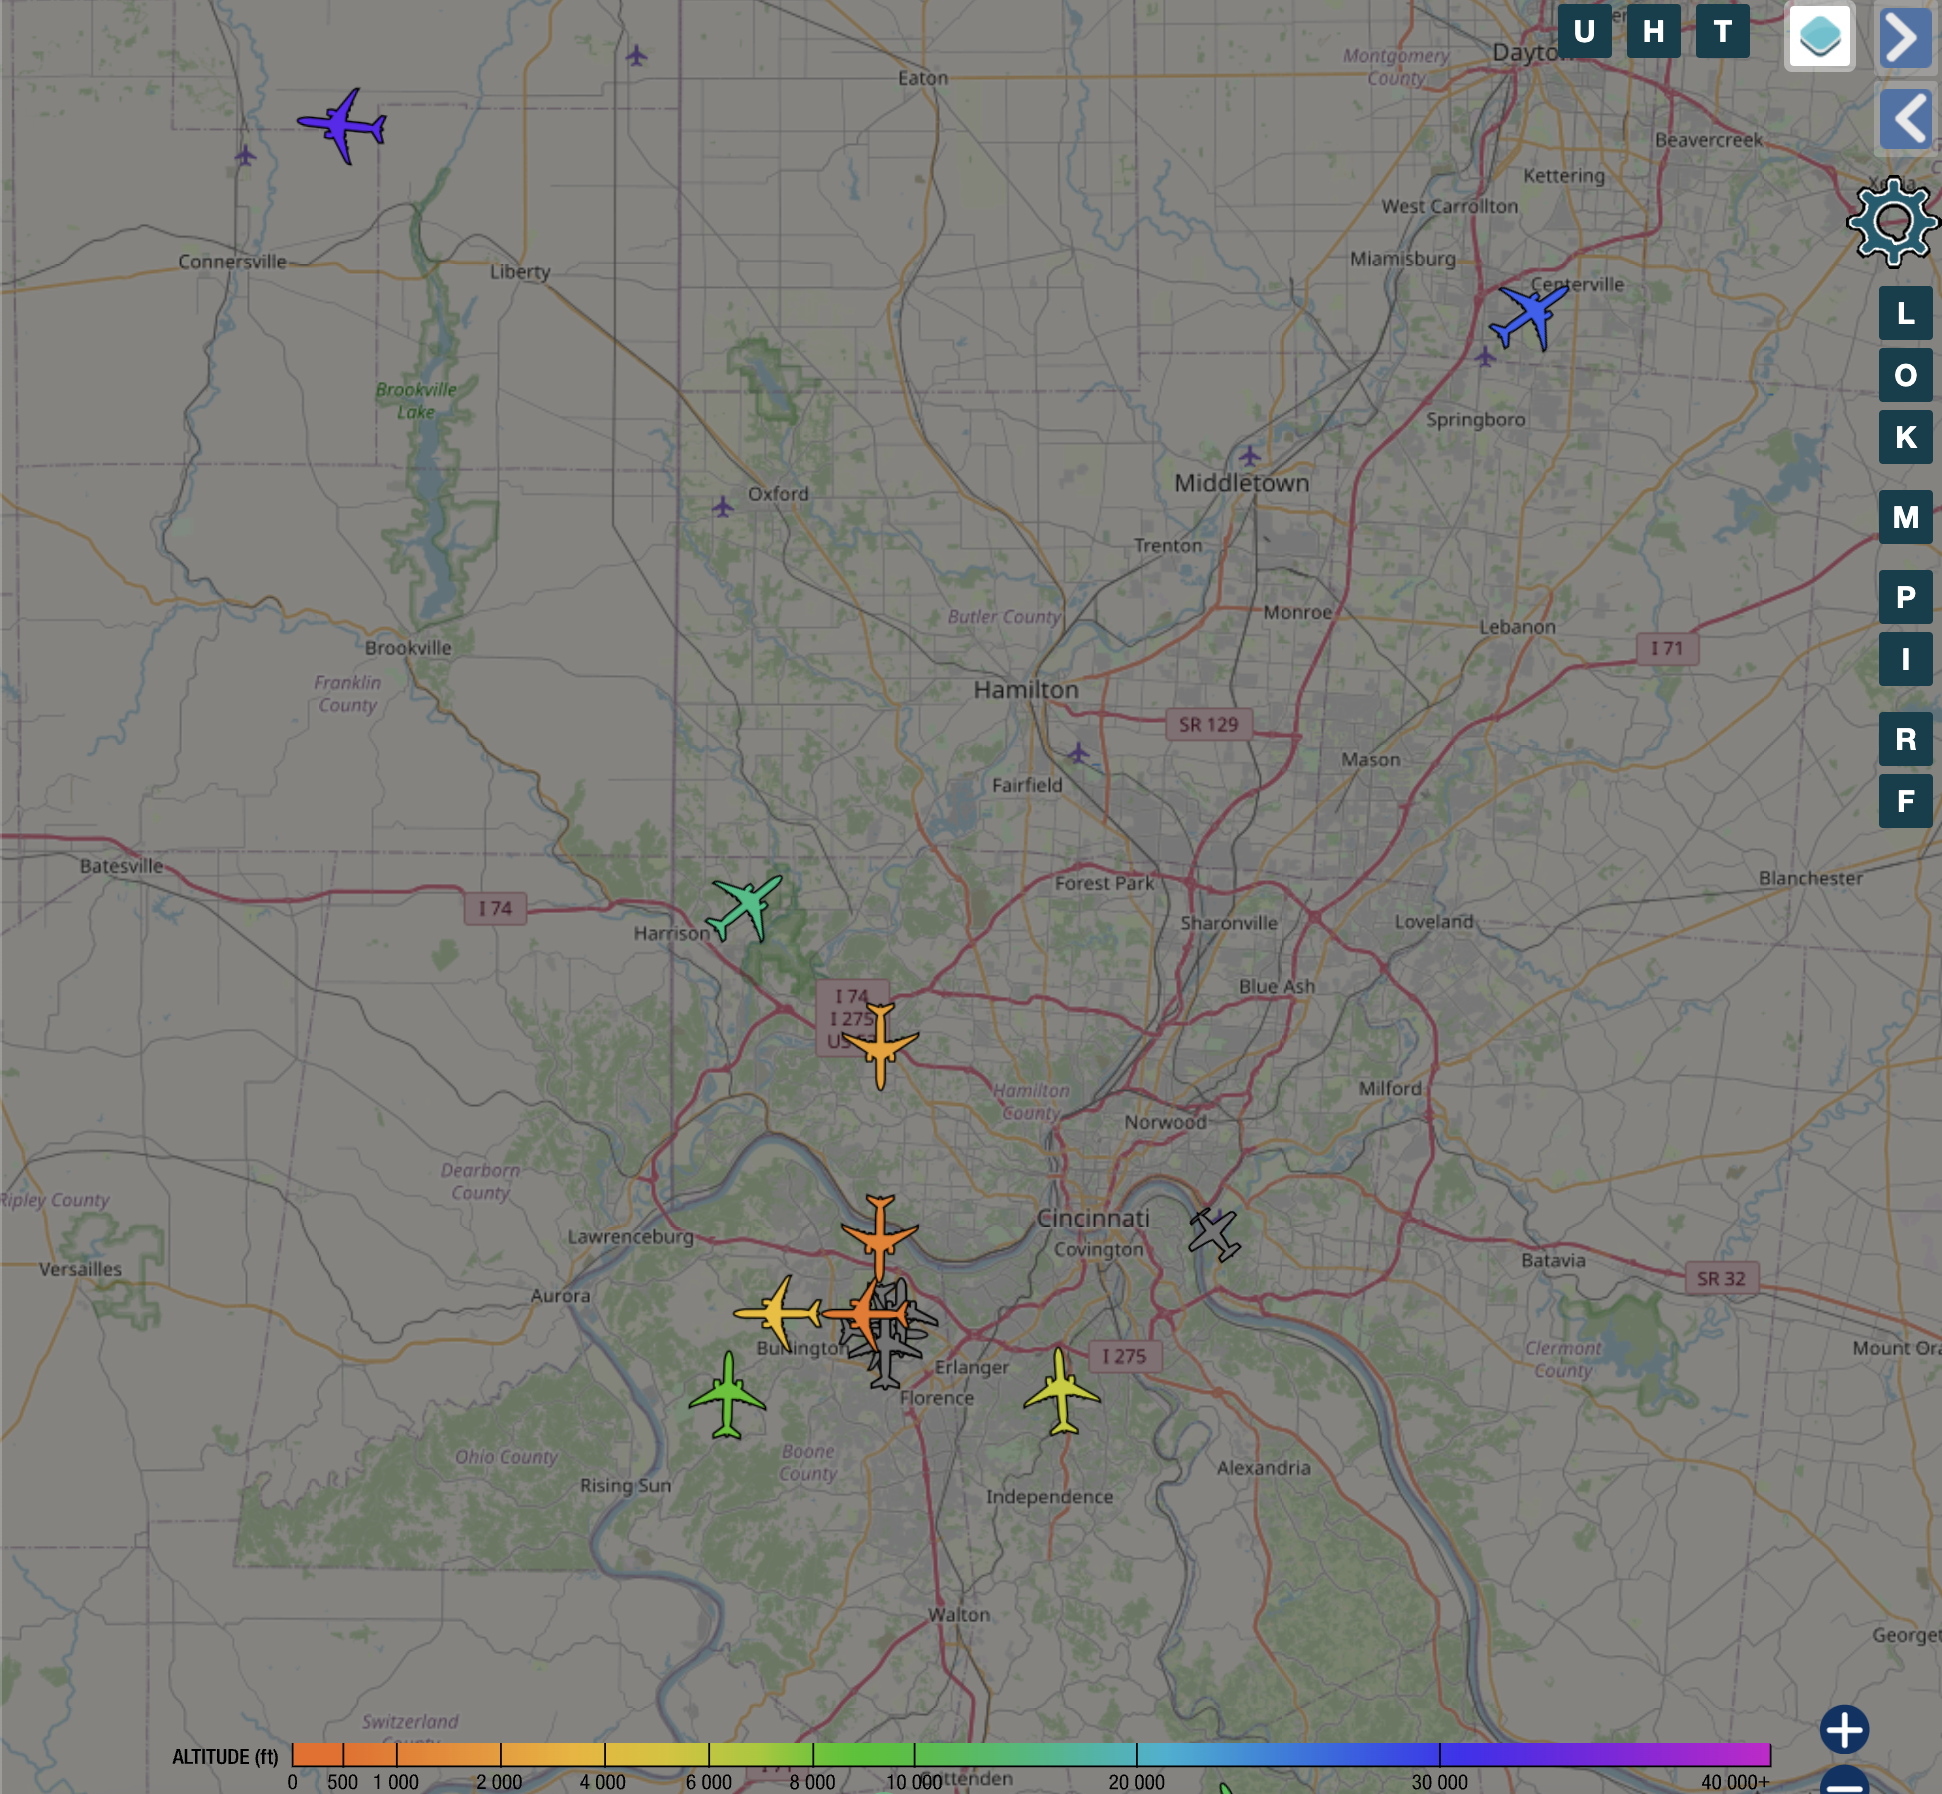
These interfaces provide real-time data about aircraft in your area, their flight paths, and other relevant information. You can use these web interfaces to track flights and explore detailed statistics.
If you want to expose these resources to the web, check out this post on how to setup a CloudFlare tunnel for secure tunneling to your resources (instead of forwarding ports) and check out this post on split-brain DNS for secure connections to your resources on your internal network. At the end of the tutorials, you would be able to access your ADS-B data securely like I do, both internally and externally: https://adsb.w3rdw.radio.
Conclusion
Congratulations! You’ve successfully set up an ADS-B flight tracker using a cheap antenna and Docker on Ubuntu. With this setup, you have created a powerful tool to track flights and contribute valuable data to the global ADS-B network. By accessing the web interfaces, you can explore flight paths, view real-time data, and gain insights into air traffic in your region.
Feel free to customize your setup further, experiment with additional features, and enhance your ADS-B flight tracking experience. Happy flight tracking!
As always, if you have any questions or want to contribute to the above information, feel free to start a Discussion on GitHub, submit a GitHub PR to recommend changes/fixes in the article, or reach out to me directly at [email protected]. Finally, feel free to join my Matrix channel for W3RDW and chat with me there.
Thanks for reading!
73 from Robert, W3RDW