Introduction
In this previous post, I detailed my transition from WordPress to Hugo static sites. This post discussed hosting the site locally in a Docker container web server and exposing ports 80 and 443 to a reverse proxy on my DMZ network. Today, I will show you how you can host your Hugo static site on Cloudflare–FREE. This will absolve your responsibility to host the site, expose ports to the public, and deal with SSL certs. Cloudflare will automatically take care of all of this for you, and Clouflare will even automatically build your site from a Git repo when changes are pushed.
This post assumes you already have a Git repo with your Hugo static site (built and verified working) (e.g., https://github.com/RobertDWhite/WhiteMatterTech) and a Cloudflare account with the ability to modify DNS records on your custom domain (although, you technically do not need to own your own domain as Cloudflare will generate a custom dev URL for you).
Cloudflare Setup
The steps are simple, really, especially compared to my last post about Cloudflare tunnels.
In your Cloudflare account, select Pages in the left navigation panel. Select Create a project and choose to Connect to Git. From here, you simply need to login to your preferred host such as GitHub or GitLab via Cloudflare, and give Cloudflare the requested account access. From there, reload your page, and you should see your Git user and associated repositories. Select the repository you would like to set up and continue. Now, choose the master or main production branch of your repo in the Production branch dropdown. Under Build settings, choose Hugo as the Framework preset, which will automatically fill in both the Build command and the Build output directory spaces. Click Save and Deploy in the bottom right of the page. Your site will begin to deploy immediately and automatically.
If the build fails, it likely failed due to Cloudflare using an old version of Hugo by default. You can adjust the version by returning to Pages from the main Cloudflare dashboard like you did earlier. Select your site that you defined earlier, and click Settings, and your page should look like the image below.
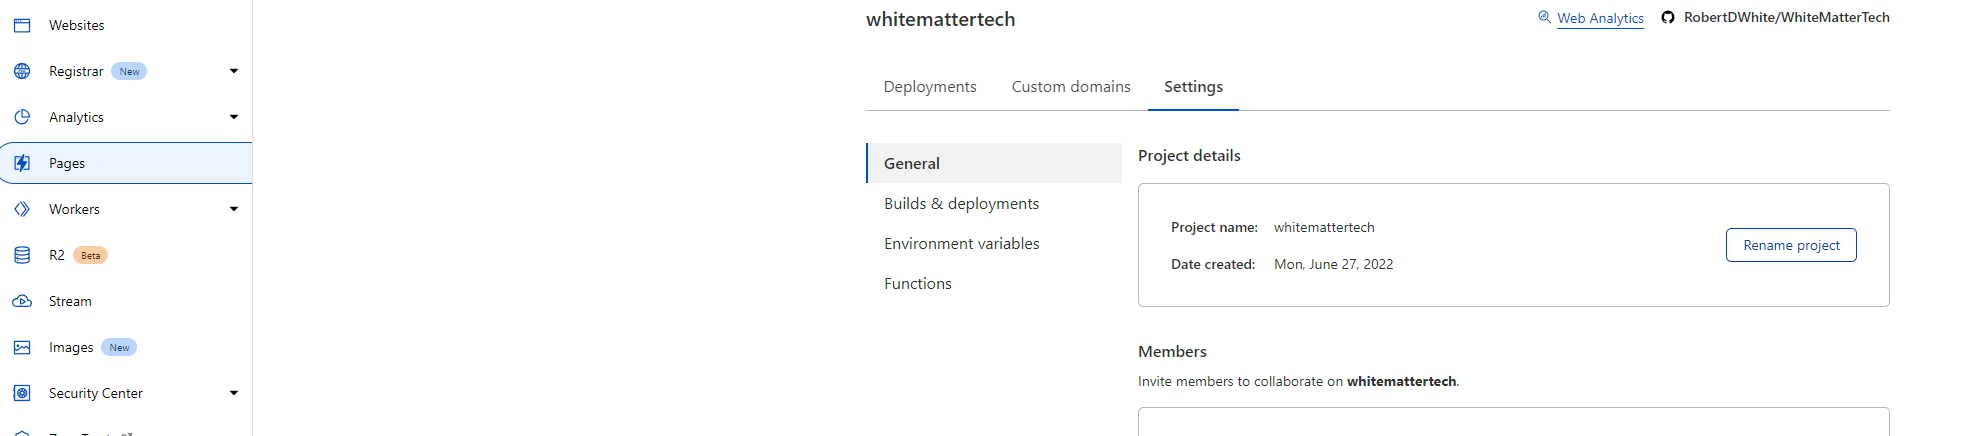 Here, select Environment variables and select Edit variables. Choose Add variable and input HUGO_VERSION as the Variable name and 0.101.0 as the Value. Be sure to click Save. Return to the Deployments tab next to Settings from above, and choose the three dots next to your attempted deployment. Select Retry deployment, and wait.
Once complete, your deployment should succeed and be accessible at the link displayed under Deployment.
Now, if you select Custom domains at the top of the page, select Set up a custom domain. Input your root domain or a subdomain as required for your site, and click Continue. You will be prompted to add a DNS record pointing your root domain or subdomain to the deployment URL provided by Cloudflare. Cloudflare may prompt you to add the DNS record automatically. Once the DNS record is added, click the button to verify DNS records again, and wait. The waiting took less than 30 seconds for me in my three separate deployments, but your mileage may vary.
Wrapping Up
Congrats! I hope that, if you made it this far, you have a working setup. If not, please reach out via the methods below. I am responsive to email, but posting a Discussion on GitHub might be helpful to others in the future. I highly prefer this option if possible. I hope this post was helpful to you in setting up your own static site hosting with Cloudflare and Hugo.
As always, if you have any questions, feel free to start a Discussion on GitHub, submit a GitHub PR to recommend changes/fixes in the article, or reach out to me directly at [email protected].
Thanks for reading!
Robert