Introduction
For this tutorial, I will show you how to run a Dockerized version of MacOS on Unraid. The project we will use is sickcodes/Docker-OSX, which is intended for conducting MacOS security research in containerized environments on Linux and Windows.
For this tutorial, I will show you how to use Unraid’s Docker-Compose functionality to manage the container. We will also be building a special VNC-compatible image, which is required for Unraid. If you are not using Unraid, building the default image will likely work better for you.
The standard sickcodes/Docker-OSX image hosted on Docker Hub uses KVM for screen rendering. While this tutorial will not natively support the NoVNC setup like the rest of your Unraid containers (yet), you will be able to connect to your container with a VNC client. I along with others are working on figuring out a solution for native NoVNC support. Until then, this guide will get you up and running.
Since the container (at the time of the writing of this post) is maintained and mostly working for our needs, this post will be short!
Building the VNC-compatible Image on Unraid
Connect to Unraid with SSH or use open Terminal through Unraid’s web portal. From here, run the following commands to download the required Dockerfile and build the image:
mkdir /var/tmp/macos
cd /var/tmp/macos

wget https://raw.githubusercontent.com/sickcodes/Docker-OSX/master/vnc-version/Dockerfile

docker build -t docker-osx-vnc .
When I originally used the Dockerfile to build my image, I was receiving invalid key errors for a large majority of the required packages and prerequisites. If you are receiving these errors too, you will need to add a couple lines to the Dockerfile and re-run the build command. If the repo maintainer(s) updates things on their end, this will be unnecessary.
First, do the following:
nano /var/tmp/macos/Dockerfile
Add the following lines to the Dockerfile, right below the “ARG MIRROR_COUNT=10” line:
# Disable signature checks for invalid key errors
RUN sudo sed -i 's/SigLevel    = Required DatabaseOptional/SigLevel = Never/g' /etc/pacman.conf
RUN if [[ "${LINUX}" == true ]]; then \
        sudo pacman -Syu linux libguestfs --noconfirm \
    ; fi
On your keyboard, type CTRL + X simultaneously, and choose to save the file name as-is.
Now, re-build the image:
docker build -t docker-osx-vnc .
Your image should now build successfully.
Creating a Docker-Compose stack on Unraid
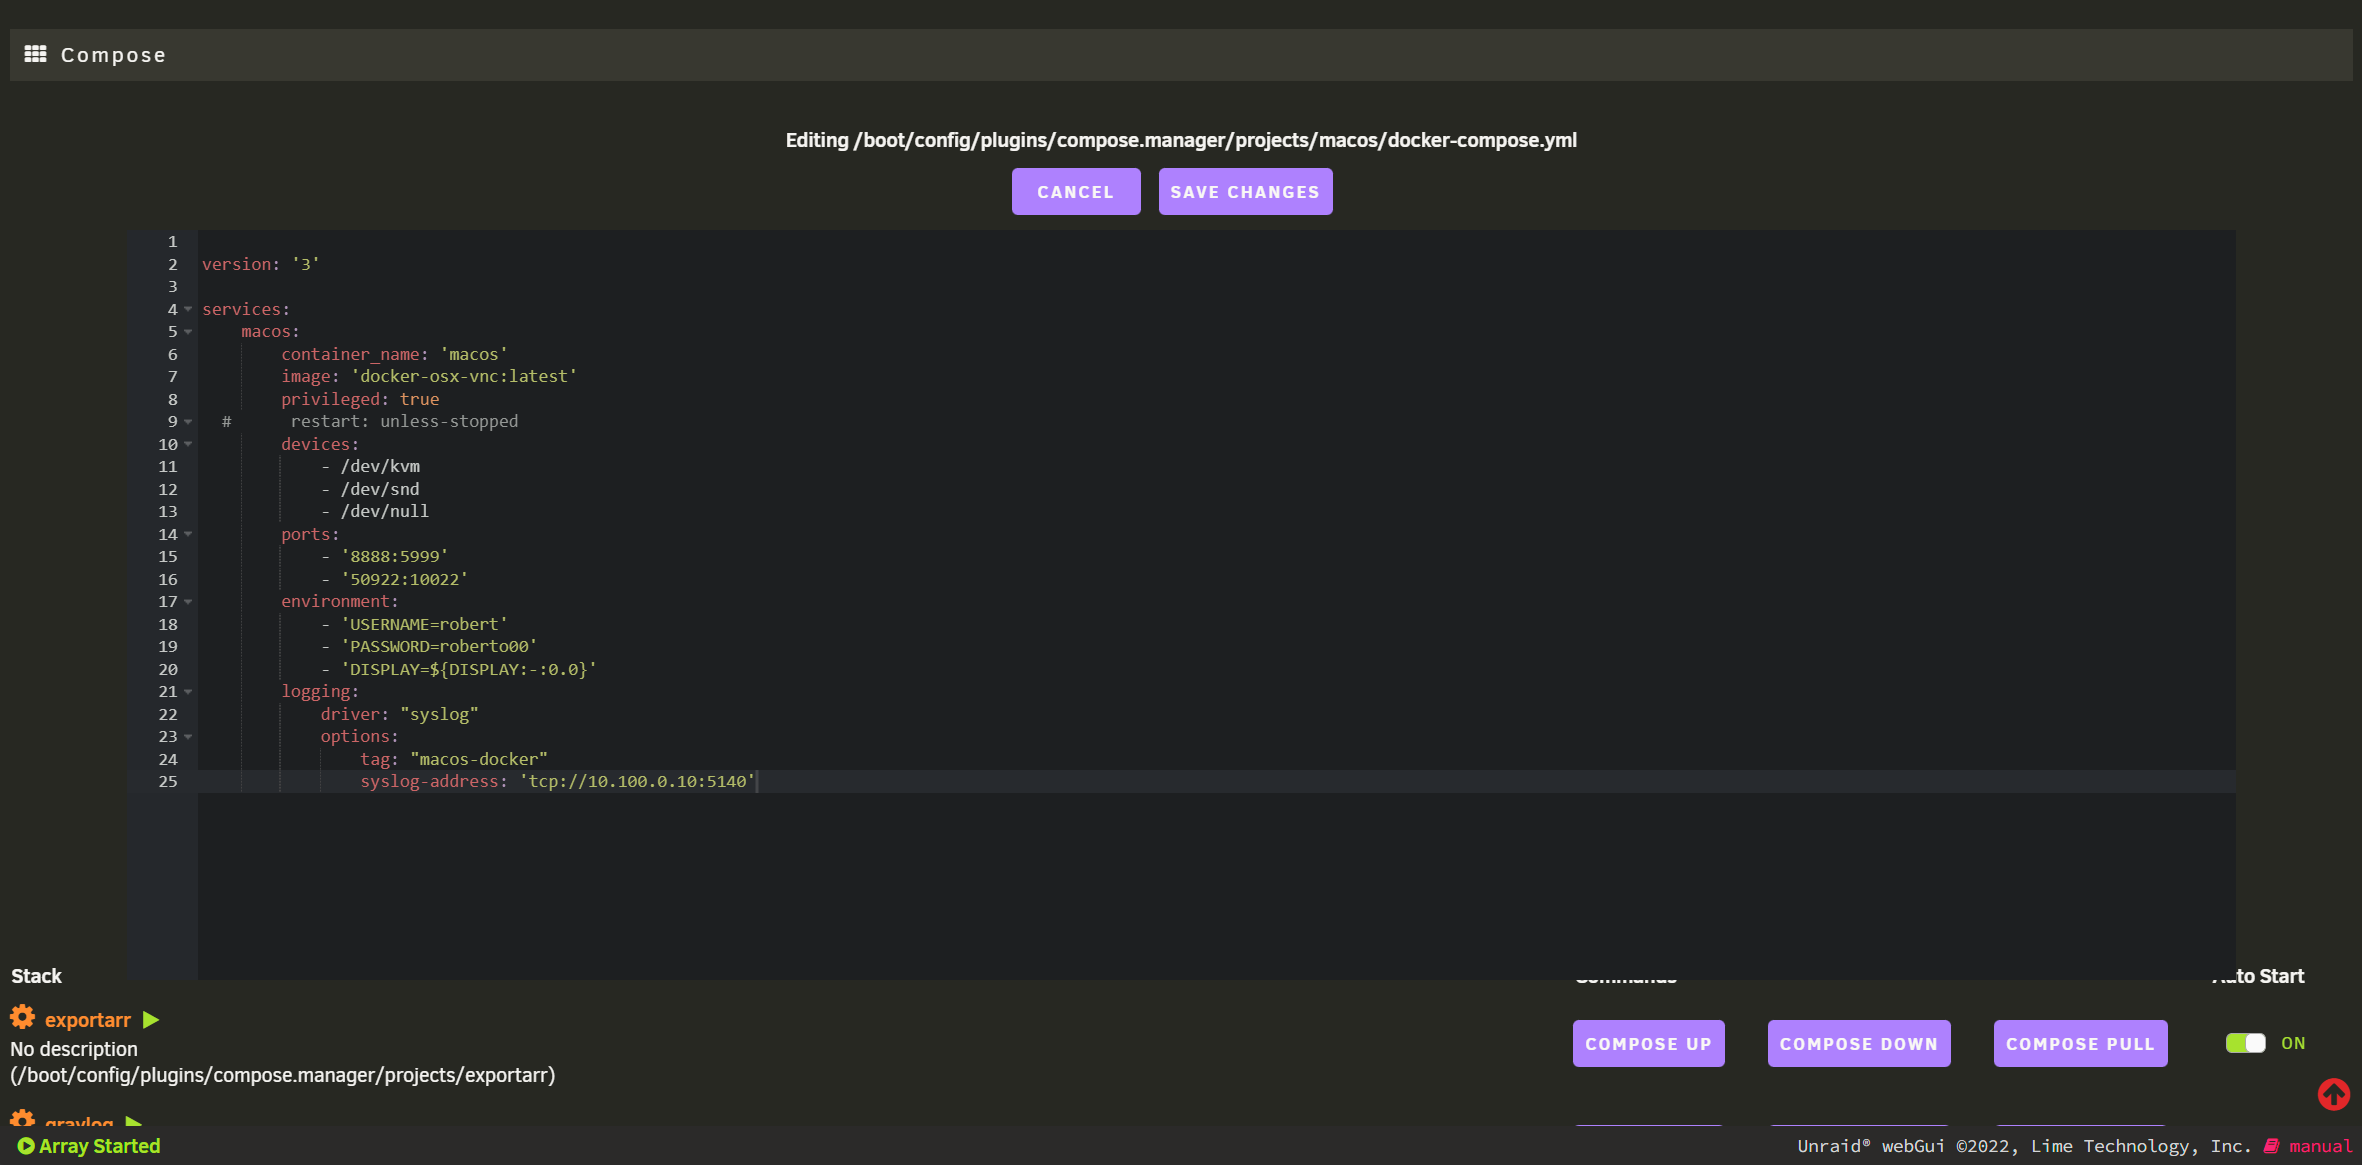
I prefer to run and manage containers with Docker-Compose whenever possible because of the simplicity and granularity of control. It is extremely easy to transfer compose files and configs between Docker hosts, and it typically simplifies sharing capabilities as well. With that said, be sure you have “Docker Compose Manager” by dcflachs installed from Community Applications on your Unraid instance. Once installed, you can scroll to the bottom of your Docker tab on Unraid to add a compose config. Select ADD NEW STACK and give your stack a name such as “MacOS.” Click the gear icon next to the name of the newly created stack, and select EDIT STACK. Select COMPOSE FILE_ on the popup, and paste the following into the text box:
version: '3'
services:
    macos:
        container_name: 'macos'
        image: 'docker-osx-vnc:monterey'
        privileged: true
        devices:
            - /dev/kvm
            - /dev/snd
            - /dev/null
        ports:
            - '8888:5999'
            - '50922:10022'
        environment:
            - 'USERNAME=user'
            - 'PASSWORD=pass'
            - 'DISPLAY=${DISPLAY:-:0.0}'
Select SAVE CHANGES, and simply click COMPOSE UP to start your new MacOS container. A Docker container will be created, and you will see your new container with the rest of your Unraid containers in the GUI. You can access the container’s logs and console from the GUI like the rest of your Unraid containers.
Running the container without Docker-Compose
If you prefer to run the container without Docker-Compose, simply do the following via SSH or the GUI Terminal:
docker run --device /dev/kvm --device /dev/snd -p 8888:5999 -p 50922:10022 -d --privileged docker-osx-vnc:latest
Connecting to the MacOS Container with VNC Protocol
Before connecting to the container, you will need to retrieve the generated VNC password. To do this, on Unraid, find the container you created called macos, click it, and click "Console" as shown in the image below:
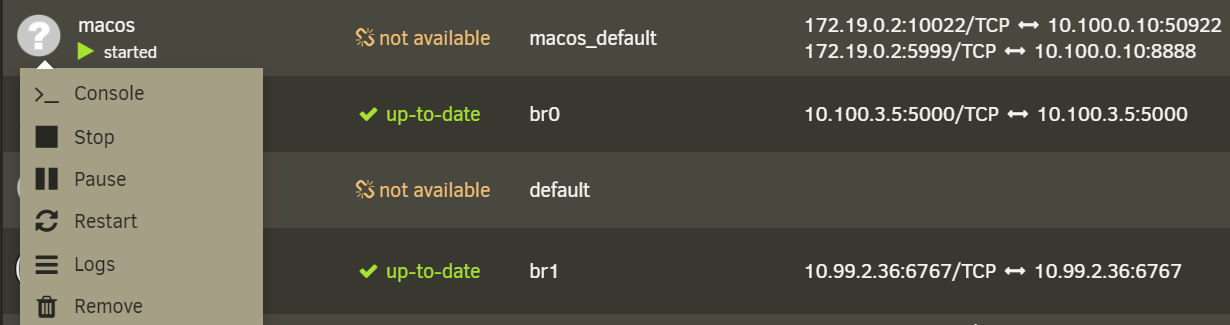
In the Terminal prompt that opens in a new Windows, type the following:
cat vncpasswd_file
The output in Terminal will be your password used to connect to the container.
Windows
In order to connect to the container, you will need a VNC client supporting the specific TigerVNC server the container is using. My VNC client of choice on Windows is TightVNC Client. Download and install the TightVNC Client. After installing and opening, type the IP of your container followed by "::8888", as shown in the image below:
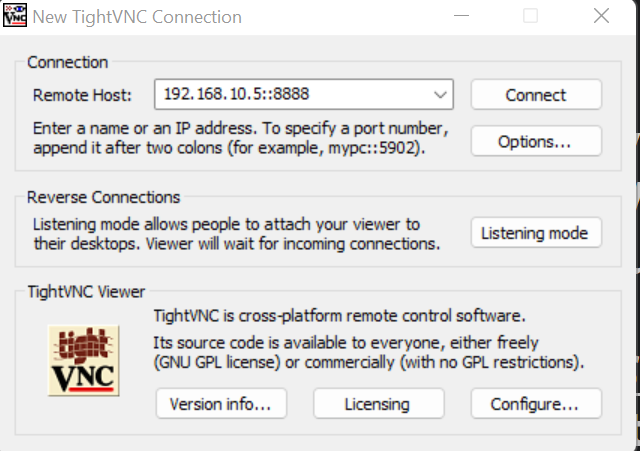 Click "Connect," and you will be prompted for the password you obtained above.
MacOS
For MacOS, I simply use the built-in VNC client. To use the built-in VNC client on your MacOS device, while on your Desktop, click CMD+K simultaneously and input vnc://IP_OF_MACOS_DOCKER:8888. You will be prompted to enter the password you obtained above.
Conclusion
As always, if you have any questions, feel free to start a Discussion on GitHub, submit a GitHub PR to recommend changes/fixes in the article, or reach out to me directly at [email protected].
Thanks for reading!
Robert